Adventures in Sourdough
/Since Front Country was gifted a starter in Alaska this past summer (2018) I have been re-exploring the wild and wonderful world of bread making - specifically, naturally leavened, country sourdough bread. The last time I had attempted the art of sourdough was over ten years ago, and the information was abundant but low quality. Most recipes called for a baking stone and/or various ineffective methods of creating steam in a home oven - including spray bottles, pans of water and ice cubes thrown onto the oven floor. Starter was also a thing of myth and pseudo-science, and some believed you couldn’t even make sourdough bread anywhere but San Francisco, with it’s magical wild yeasts that ride in on the sea breeze. Yeah, that’s all bullsh*t (turns out, it’s in the flour).
When Mark Bittman of the New York Times popularized the first “no knead” bread recipe baked in a dutch oven, it was a revelation. I watched the video, made the simple yeasted bread, and felt all at once victorious at the result and betrayed by decades of bread baking books. Why didn’t anyone figure this out sooner? The crust was perfect - dark and chewy yet crusty. The loaf was tall and full of bubbly holes like a real rustic loaf should be. The results were instantly head and shoulders above any homemade bread I had ever made or had, and I was so pissed about it I stopped baking bread for a decade.
Fast forward to 2018 and when our band was gifted some supposed 100 year old liquid Alaskan sourdough starter, I vowed to once again attempt the art of naturally leavened sourdough bread. Luckily the resources are plentiful now - some 15 years after Bittman’s no knead bread and Tartine setting the bar for rustic perfection. YouTube and the blogosphere abound with accessible and accurate guides to artisan bread baking. Here are a few of my favorite resources.
#1: Joshua Weissman’s No Knead Beginner Sourdough Bread
I used this YouTube tutorial for my first bake and got great results the first time, and even better on try #2. If you watch this a few times and take some notes, then follow his instructions exactly, you should be good to go. The only thing he glosses over is gluten development, and that is the only reason my second try was even better. To make your first try the best it can be, make sure you work the dough a little longer than he says to before going into bulk fermentation and folding. Everything else in this video is right on the money.
#2: The Perfect Loaf blog
This blog is a comprehensive resource on beginning to intermediate sourdough bread making. Dig it.

#3: Trevor Jay Wilson’s Instagram
Along with his hashtag and ebook #OpenCrumbMastery, I have learned so much about the craft and science of sourdough from this dude. He is codifying and evolving a modern technique that yields Tartine-like textures at home. Buy his eBook here, or follow him on Instagram to watch his constant experimentation in real time.

#4: NYT Cooking Video - “Speedy No Knead Bread”
From the earliest days of foodie YouTube, way back in olde 20 and 06. This isn’t the best method at all, but it’s the simplest show-and-tell of the dutch oven technique, demonstrated to Mark Bittman by Jim Lahey, and it was my first exposure to the idea.
Things I have added to my personal method so far:
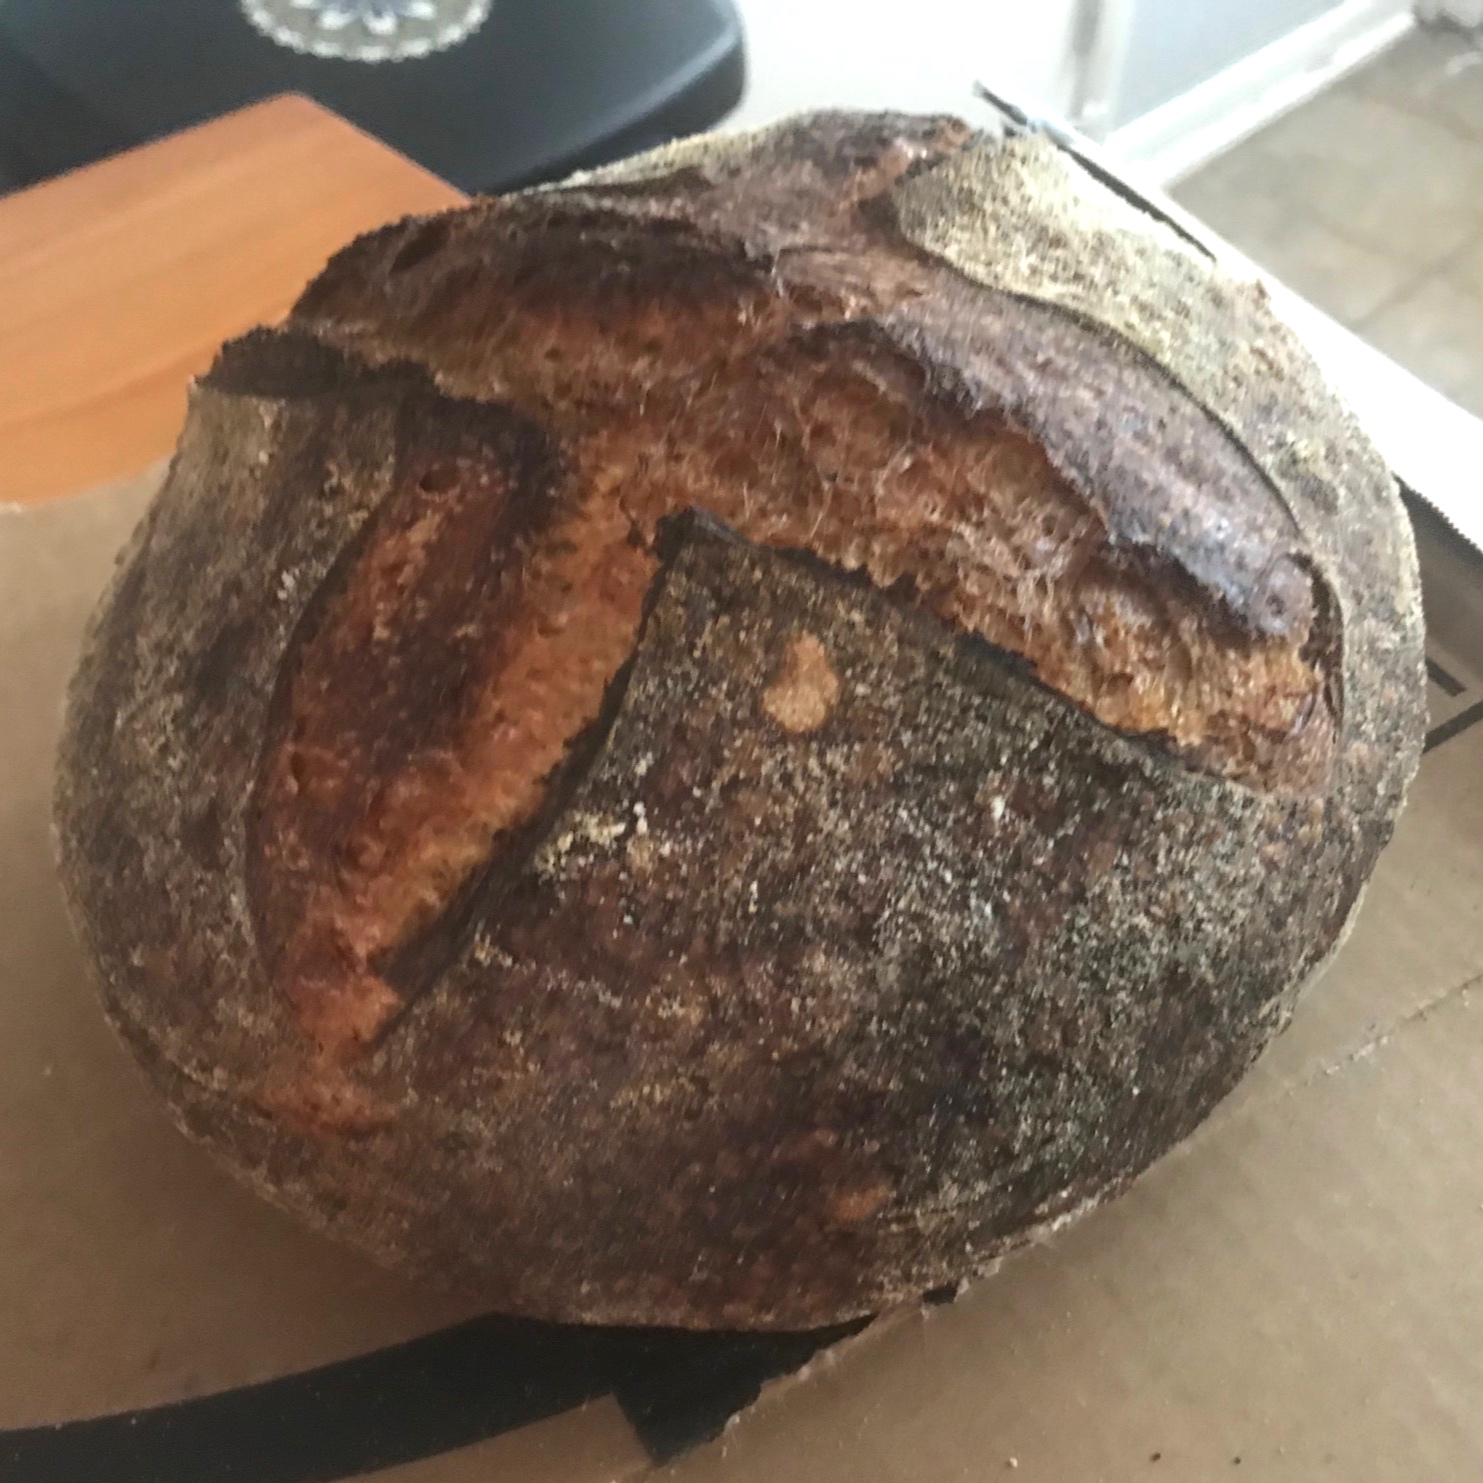
Bannetons: inexpensive rattan baskets for the second proof of bread after shaping (that’s where some of these loaves get that beautiful spiral - I only have one, so the other loaves you see have been proofed in a bowl with a cloth. I’m planning on grabbing a few batard shaped ones next.
Parchment: Don’t mess around with a bakers peel and trying to slide wet dough into your dutch oven. Cut a circular piece of parchment an inch or so wider than your loaf, place it on top of your proofing bowl or basket and then invert. Quickly score and then use the sides of the parchment as handles to gently lower the loaf into the scorching hellfire.
Rice Flour: crucial for dusting the bowl or banneton. It won’t meld into your loaf while it sits, and creates a non-stick coating that doesn’t get cakey. What you see in my photos is all rice flour dusting.
Pre-heating: the one-hour preheat at 500F is a must, to get the dutch oven screaming hot and get the oven spring I want, but once I take the lid off 20 minutes in, I turn down to 450F for the last 20 min. You want a dark ochre color all over, otherwise your middle might be underdone.
Shield your bottom: I was having some great bakes with these high temps, but my bottoms were coming out a bit too dark and bitter. The solution? Halfway through the bake (when you take the lid off and turn the temp down) throw a sheet pan on the rack just below the dutch oven to deflect some of the heat.
No Cooling Rack? It’s cool. Just use a cardboard box turned upside down. That’s what I do for cookies too.
Coil Folds: Trevor Jay Wilson (@trevorjaywilson) has a very specific folding technique that develops dough strength and keeps large bubbles while elongating them. Check out his instagram for examples. Lately, I have been starting with two “stretch and folds” (like in Joshua Weissman’s video) and then switching to 4 more “coil folds” during bulk. It is magic.
Rye Starter: I keep an all rye starter at a 1:2:2 ratio of starter to rye flour to water. Rye is pretty “hot” food for starter, so mine triples fairly quickly (in about 3 hrs). I find it adds a complexity of flavor to my loaves, and my starter culture seems to love it, so yay!
Young Starter, Young Levain: Because I have a life, I don’t always succeed at timing this just right, but I’ve found that it is noticeably ideal to make the levain out of starter that is at it’s peak (for me, about 3 hrs after feeding), and then use the levain when it just peaks (3-4hrs). This is when I get my best shaping and oven spring.
Brown Bag it: Don’t ziplock your loaves - at least not right away or the crust will get leathery. Use a brown paper bag (I just grab extras from the grocery store), and then maybe use a plastic bag after day 2 to keep the cut pieces hydrated. After the second day, you’ll be toasting it back to life anyway.
What are your sourdough trials and errors? If you have tips or questions, I’d love to hear. Hit me up to talk bread!
Here is a gallery of my sourdough loaves so far…